TDD
Advanced
Hello and welcome to Advanced Ruby Testing Masterclass (Rspec edition). In this course, I will present the most advanced topics in testing Ruby, Rails, and React-Rails applications using Rspec and Capybara, two premier tools for unit and end-to-end testing, respectively.
We will cover test-first philosophy, the mechanics of working with Rspec, how to structure your tests, and the purpose of testing. I’ll cover mocks, spies, fakes, and doubles and explain when to use mocking or stubs and when not to.
In the latter half of the course, we’ll get into Capybara, the powerful domain-specific language you will use to test your front-end applications in the browser. I’ll cover the all-important topic of race conditions, which is critical to understanding how to test Rails and React-Rails apps effectively. You will learn the secrets to dealing with race conditions in your test suite. These are secrets that very few people know about and understand, and in this course, you will get an in-depth look at how to deal with race conditions.
Remember, this course covers Rspec, not Minitest. If you are looking for a course that covers Minitest, please see my other course, which is also titled Advanced Ruby Testing Masterclass, that course is Minitest Edition.
Please note that both courses cover overlapping material, and they are designed so you can purchase either one— you should buy only the Minitest course or the Rspec course, depending on which one you want to learn. Both courses follow the same curriculum except for specific parts where Minitest and Rspec differ— of course. There is Rspec-specific material in this course and Minitest-specific material in that course. However, all code examples have been written in Rspec for this course and in Minitest for the other course.
When we get to the Capybara section of each course, the two courses are pretty much the same — except this course shows code examples in Rspec and the other course shows examples in Minitest.
Many of you may have a background in computer science, some of you may have learned at a boot camp, and many others watching this will be self-taught. This course is designed to be accessible and easy for all levels, but it is not a beginner-lev course. I will not cover the basics of writing React code or Ruby code. Although many of the examples in the course get into the mechanics of how these work, you should supplement this course with a beginner course in web development if you haven’t already done so.
You’re probably wondering who I am and why I created this course.
My name is Jason Fleetwood-Boldt, and I run a consulting agency in New York City that specializes in TDD and automated testing for Rails and React-Rails applications.
Many boot camp grads I’ve talked to have told me their boot camps did not cover TDD or testing. As well, I’ve learned that while a lot of the formal computer science undergraduate programs have caught up quite a bit in the last several years, the majority of them still are not teaching TDD or application testing.
I find this very distressing because— well, for one, I love testing. But more importantly, learning how to test your code is hands down the most important thing you can learn to become a successful long-term developer in today’s competitive marketplace for software engineers.
In preparing for this course, I watched a lot of other courses on the internet— I spent hours and hours looking over other people’s courses. Unfortunately, what I found was that most of the educators making content on the internet to teach people about coding fall into one of two categories:
(1) People who are very good educators but do not have the depth of real-world industry experience. These instructors’ courses are often very good at the beginner level but do not teach advanced topics like testing.
(2) Instructors who are experienced in the industry but not very good educators. These people’s material is either very high-level and not focused on the nuts and bolts of writing code, or they aren’t very good at breaking down concepts and presenting them in a digestible way.
So I built this course to fill a gap in the market: An advanced course that covers the topic of TDD and automated testing in-depth, uses real-world accessible examples, and is specifically written for Ruby and React-Rails applications.
There has been a long lineage of TDDers who came before me, and I owe much of my success to the path that they paved. Many of the most prominent TDDers were Java developers— a highly elite programming language in enterprise settings. While the cohort of Java TDDers did a lot of great work, there has been quite as much work done to evangelize TDD in the Rails and React-Rails worlds, and so that, too, is a niche I’m trying to fill.
This is the course for you if you have learned some Ruby and have learned some React but aren’t confident about your testing skills. This is the course for you if you have been doing Rails for many years but have mostly written untested Rails code and are now trying to transition into being a sought-after specialist who writes tested code.
Let’s be frank: Frameworks come and go. Languages come and go. But there’s a reason why TDD and automated testing lasts: The reason is… it works!
I’ve worked for and consulted with numerous startups and big corporations. And in my work, I’ve noticed a consistent pattern: Typically, tested codebases succeed, and untested codebases fail. I will get into more about why this is so predictable, but this fact is something that new engineers need to pay attention to right at the start of their careers.
What’s very unfortunate is that many environments where you might find yourself do not have a strong culture and value around TDD or automated testing. To be honest, most of the CEOs I’ve known do not understand what automated testing is. Many companies — even companies like Google— start their lives with very little or poor testing. They have an uphill battle to bring about the transformational change needed to write tested codebases. Google was able to successfully bring about this change in 2005 using a company-wide newsletter called ‘Testing on the Toilet’ they distribute to this day in the bathroom stalls of all of the bathrooms in the company.
So this course is designed to give the beginner web engineer a north star: If you learn automated testing and follow the guidelines I will teach you, you will immediately become a more valuable engineer than if you write untested code.
Teams and companies that do not write untested code typically must hire more engineers who work under toxic and stressful conditions. Writing untested code should be outlawed — or, at the very least, considered malpractice. I believe that predatory companies that hire engineers who do not write tested codebases need to be purged from the industry. Fortunately, most of these companies fail anyway, but the damage they do along the way is very real and very dangerous.
So, don’t fret: You’ve come to the right place. It’s a competitive industry, and becoming a top engineer requires a lot of smart work, but if you know how to test your code, you can get there and succeed. Many other ways you can learn will not give you the best tools. In this course, I will set you up for success, and you will succeed with TDD and automated testing.
How is this course Different?
You can learn TDD by watching Youtube videos, reading any of the books that came out of the Java-TDD era, from reading papers and tutorials. But what makes this course different?
Many boot camps are failing to teach TDD, which is unfortunate. Some introduce students to the basics of unit testing and the basics of black box testing but don’t go beyond that.
What few tutorials there are typically are feature-based tutorials that teach you the feature set and configuration options of Rspec option by option.
These types of tutorials are not typically what you need to learn to become a successful Rubyish who can write effective unit and end-to-end tests.
What you need to learn to become effective at testing are:
• The philosophy of testing itself, why we are testing and what we are testing
• The mechanics of mocking
• A few additional gems Gems: Wemock, Faraday, and VCR, and FactoryBot
• How to use Capybara
• Race conditions
In this course, I’ve composited all of this education into a single class and designed it to be w wholistic view of all the tools you will need.
Without a complete picture of what it looks like to use all of these tools effectively, it can be difficult to gain traction when trying to test your code.
So without further ado, let’s dive in.
What is Hermetic
• Describe Blocks
• It Blocks
• Derived Class
Let’s assume we had an object called WebService
RSpec.describe YourApp::WebService do
1/ Install Rspec + Factory Bot
Add to Gemfile in a group marked :development and :test. Be sure to add it to a group for both :development and :test (do not add it to only a :test group).
gem 'rspec-rails'
gem 'factory_bot_rails'
then run bundle install
Run the rspec installer with
rails generate rspec:install
Now, notice that these files are created
      create  .rspec
      create  spec
      create  spec/spec_helper.rb
      create  spec/rails_helper.rb
Now delete your test/ folder with
rm -rf test/
(This removes the default folder for Minitest, which is the alternative to Rspec that we are not covering in this tutorial.)
Check-in this code using Git and give it a commit message of something like “installs Rspec”
2/ Meet the spec_helper.rb and rails_helper.rb
For historical reasons, Rails-Rspec apps come with two default files: spec_helper and rails_helper.
All Rspec specs must begin with this exact line, at the very top of the file:
require "rails_helper"Note that the rails_helper.rb is inside of spec/ folder, even though your test might not be. When you run any rspec test, it runs as if the working directory is the spec/ folder itself, even when you are running a spec nested several folders deep. So all Rspec specs you write, including ones nested several folders deep, so do not try to use relative paths if your spec is nested several folders deep. Just include the line exactly as-is: require "rails_helper"
Both files contain Rspec configuration, but rails_helper.rb contains configuration specific to Rails. Let’s take a look a the default spec/rails_helper.rb file now.

First take note this is where RAILS_ENV is set to test. The ||= Ruby operator is called null coalescence and it means that if the RAILS_ENV is not set in the environment (ENV global variable), then set it here.
Then we explicitly load any settings specific to the test environment itself. (These are found in config/environment/test.rb)
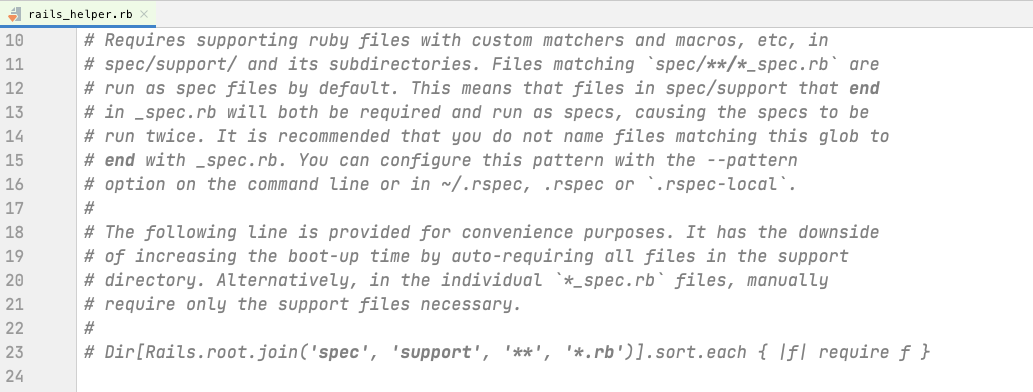
Pay attention to what this comment says: Rspec looks for any file inside of the the spec/ directory that ends with _spec.rb. Those files will automatically be seen as spec files, but other files will not. If you can’t figure out why your spec isn’t running, make sure the file is named correctly.
Take a look for the top of the line that begins
RSpec.configure do |config|
A few lines down, you should see config.use_transactional_fixtures = true
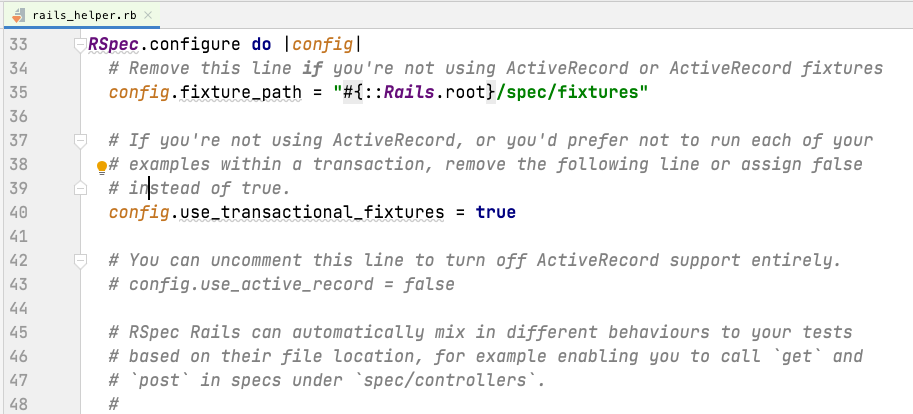
Here is the important line that defines our use of transactional fixtures, as discussed in the introduction to this lesson. If you set this to false, you will switch Rspec into truncation strategy.
Towards the bottom of the RSpec.configure do |config| you will see another important config:
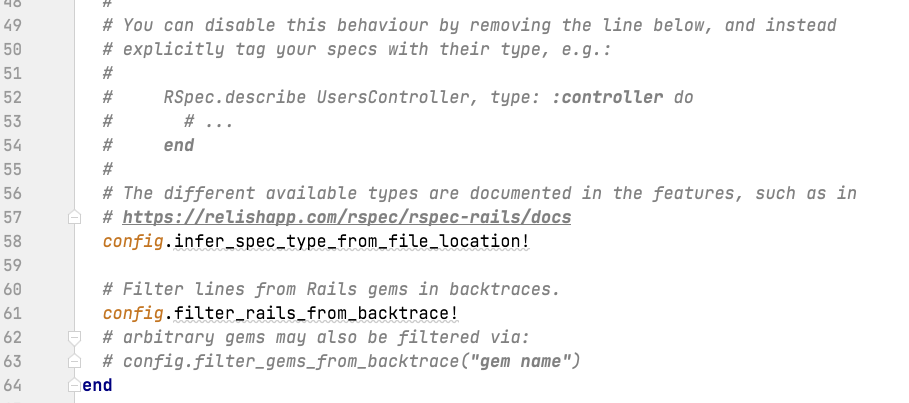
The infer_spec_type_from_file_location! setting. When enabled by calling it with the bang method (!) as you see here, specs will have added behaviors depending on what folder they are located in.
This is most relevant when we get to writing request specs and system specs, where we need either request spec helpers or Javascript, and so by putting the specs into these folders, we are telling Rspec to run with either of these things.
Those are the most critical parts of the rails_helper configuration, and in this tutorial, I will go over the default Rspec configuration only. Once you’ve finished the tutorial, explore the various settings.
Now that we have a Rspec installed, it is time to write your first spec. Exciting no?
3/ Your First Test
Let’s suppose we have some pencils. Pencils can be of different colors, and we can set Pencils to be any color we want.
We will first create Pencils as its own PORO — plain old Ruby object.
Let’s begin by writing a spec.
Run the rspec generator to create a pencil spec
rails generate rspec:model pencil
require 'rails_helper'

RSpec.describe Pencil, type: :model do
 it "should create a pencil" do
  expect(Pencil.new).to be_a(Pencil)
 end
end
Then run your spec and watch it fail. You are now RED on the RED-GREEN-REFACTOR cycle.

Remember, always use the testing process to describe the code you want. In this fashion you will consistently describe the code you want first, then implement only as much code as to make your test pass.
To implement this spec, all we have to do is create a Pencil class at app/models/pencil.rb
class Pencil
end
Let’s go one step further and give our pencil a color attribute.
require 'rails_helper'
RSpec.describe Pencil, type: :model do
subject {Pencil.new}
it "should create a pencil" do
expect(subject).to be_a(Pencil)
end
it "should have a color attribute that will default to nil" do
expect(subject.color).to be(nil)
end
describe "#set_color" do
before(:each) do
subject.set_color("red")
end
it "should have a color attribute that can be set" do
expect(subject.color).to eq("red")
end
end
And our implementation code:
class Pencil
attr_accessor :color
def set_color(color)
@color = color
end
end
We are now GREEN in the RED-GREEN-REFACTOR cycle. This means we can proceed to add new features by adding specs first and then implementing those features. We can also refactor the existing features with confidence, knowing that automated specs are covering expected results.
This is why it is called the “RED-GREEN-REFACTOR” cycle by continuously providing feedback to us, the developer, the test cycle allows us to work exponentially smarter, which in turn gives us incredible powers to produce code that is open to being refactored and resilient to change.
Expect the Initializer to Take a Color Attribute
require 'rails_helper'
RSpec.describe Pencil, type: :model do
subject {Pencil.new}
describe "initialize" do
it "should create a pencil" do
expect(subject).to be_a(Pencil)
end
describe "with a custom initializer" do
subject {Pencil.new(color: "red")}
it "should have a color attribute that can be defined in the initializer" do
expect(subject.color).to eq("red")
end
end
end
describe "#set_color" do
before(:each) do
subject.set_color("red")
end
it "should have a color attribute that can be set" do
expect(subject.color).to eq("red")
end
end
end
class Pencil
attr_accessor :color
def initialize(* args)
@color = args[0][:color] if args[0] # a passive initializer (silently fails of no color)
end
def set_color(color)
@color = color
end
end
Refactoring Example (Address Denormalize)
4/ Your Rspec Workflow
Run the Next Failure
Rspec has a “Next failure” feature to shorten your workflow and make it efficient. To use this option (--only-failures), you must first set `config.example_status_persistence_file_path` in your Rspec.configure block.
rspec --next-failure
or rspec -n for short
This tells RSpec to use the last complete run (which it stores in a file in tmp/) to determine the first failing test. It runs just that test.
The simplest, most lightweight workflow is to use this flag to fix run the first failing test, fix it, then run the next one. Wish, wash, repeat.
5/ Random Specs and the Random Seed
By default, your specs are run in random order. The randomness is determined by a random seed number, which is shown to you at the top of every RSpec run. RSpec will generate a new random number at the start of each run, show it to you, and then use this number to determine what order to run the specs in. If you re-run the specs using the same seed number, the specs will re-run in the same order.
This is considered best practice because specs should be independent of one another. Running them in a random order helps to find flakey tests that only pass when they are run in a specific order and fail in another order. This is important because it’s common (dangerously easy) to accidentally write specs that will have an order-dependancy, or fail when one before or after a specific other test.
When RSpec runs the test in random order and then it fails, how can you re-run the test in the exact same order again to debug the issue?
That can be done by telling RSpec to use the same seed for its randomness as it was used before.
RSpec tells you this seed when it is starting:
$ rspec spec


Randomized with seed 29451

.....*.........
Here, re-run the specs in the exact same order run using the –seed flag with the same number that was generated randomly: 29451
$ rspec --seed 29451
6/ Dots and “Docs”
When you run RSpec by default, it will show you an output of green dots (or red ones for failing specs). Sometimes you may have specific specs which will hang or take
e a long time*, and thus you won’t be able to see which one is hanging. The t
*hanging is when a process does not terminate forever; for example, it is caught in an endless loop

To debug this kind of problem, you will want to set the flag -fdoc
This will tell Rspec to output the full documentation of what is run — listing out the test names themselves on the screen in red or green(*)
--format doc
COLORBLIND CONSIDERATIONS
If you are red-green colorblind, you can use the setting Rspec.configure to set your Rspec to use any color for success or failure messages. You also get options for setting colors on pending, fixed, and detail.
For example, to keep the failure color as red and make the success color blue, add this line to your Rspec.configure
RSpec.configure do |config|
  config.success_color = :blue
end
7/ Backtraces
To see the full backtrace of the crash, enable this in spec_helper.rb
config.full_backtrace = true
Or, just run your spec with --backtrace
8/ Factory Bot
Factory Bot is the premier Ruby tool for creating factories for your test suite.
Your factories will live in a folder at spec/factories and will have the same names as the objects they represent.
Each time you build a factory (or create one, explained below), a new instance variable will come into Ruby’s memory space.
Build vs. Create
When you call build(:xyz) it will be as-if you had called .new on the thing you are creating — therefore, it won’t save it to the database.
When you call create(:xyz), you will be telling Factory Bot to instantiate and save your newly created object.
Build is typically preferred in Rails apps because it is much faster. It makes it so that your tests aren’t dependent on “hitting the database” (that means making any database calls)
This means that model-level validations will not be applied because the record won’t actually be saved.
Typically for much unit testing, where you are testing the internals of the code you are writing,
Often, however, there are necessary reasons to use create instead of build:
– When working with multiple objects, like in an integration test, ActiveRecord cannot save child records until the parent record is saved. This makes it necessary to either use create (which instantiates and saves the new object), or use build along with a save. (You can save only the child record too, which will
Initialization
initialize_with
skip_create