A modifier key is one of those special keys on your keyboard that you press along with another key at the same time.
In addition to typing out commands, you will also learn to use these shortcuts to manipulate text, to move around (like to move the cursor one word or back), to use the Unix yank command to pull text back from the kill stack, and other things.
The four modifier keys appear on your Keyboard in the lower left and lower right positions in different places on different keyboards.
Mac
On the Mac, you will have Shift, Control, Option, and Command. (On Mac keyboards, the one with the ⌘ key is the Command key).
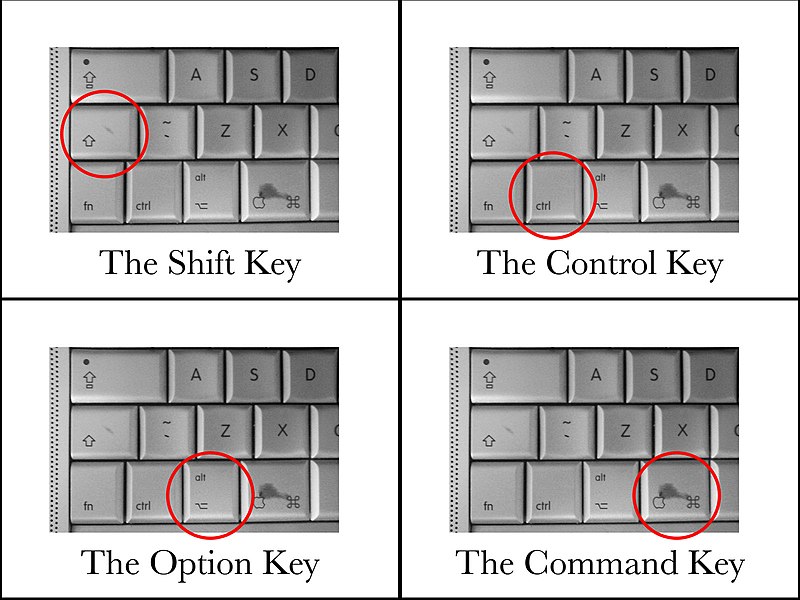
Benhalsall (talk) (Uploads), CC BY 3.0 https://creativecommons.org/licenses/by/3.0, via Wikimedia Commons
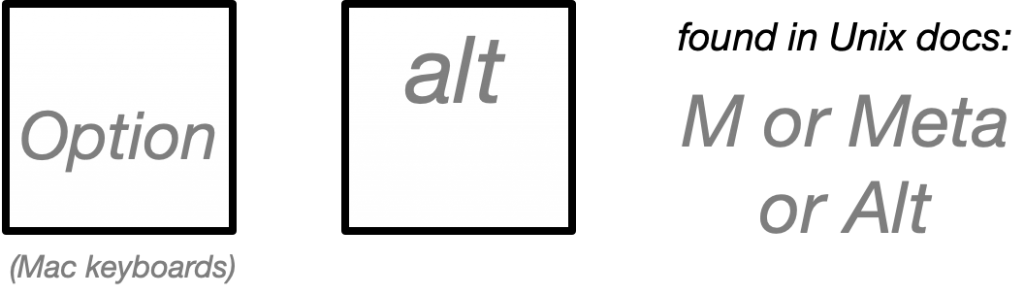
If you have a mac, be sure to note that the Option key is the same as the Alt key, which we’ll learn is also called the Meta key (if you enable it correctly), below. When reading Unix/Linux documentation, when you see Alt key, it is referring to your Option key.
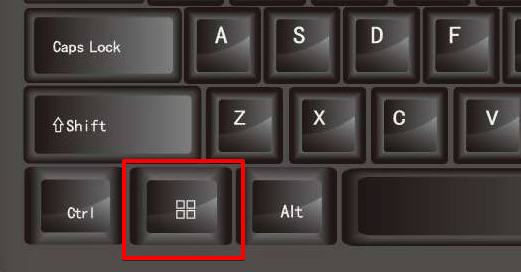
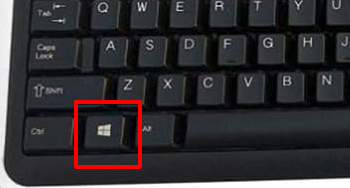
Windows
On Windows keyboards, you have the same four keys: Shift, Control, Alt, and Command (Note that on Mac the Alt is is referred to as Option. For the rest of this course, we’ll refer to it as Option so remember this means the Alt key on your windows keyboard. The command key for Windows keyboards is the one with the Window logo on it, which looks different over time but typically has the 4-panel window shape, like these examples. (The command key is outlined in red.)
Get Comfortable Keystroking with Ctrl and Meta
You probably already use the Shift key to make capital letters and will continue to do so as you learn Unix. In Unix/Linux, there are two important modifier keys: The Control key (Ctrl), which typically written with a C-, and the Meta key, which is always written with a M-
As you might have guessed, the C- key (or Ctrl key) is what you see on your Mac or Windows keyboard as Ctrl. But what about the Meta key?
You can do things using shortcuts. In this lesson, we’ll cover:
- Moving to the beginning of the line
- Moving to the back of the line
- Moving forward one word
- Moving backward one word
- Taking text away (“killing”)
- Adding that text back somewhere else (“yanking”)
These keystrokes are called “GNU readline library” or “GNU readline shortcuts”
These shortcuts work for both Bash and ZShell, but not all shortcuts do, so check which shell you have to make sure the shortcut works in your shell.
Finger Posture
The best finger posture is to press the modifier key with your left or right pinky, whichever hand you feel comfortable with. For myself, I use my left hand for modifier keys even though I am right-handed.
C- Keys
You will see in Unix/Linux documentation keystrokes labeled as C-. This means the Ctrl key.
Press the modifier key first with your pinky, then the other key, then both fingers lift up.
Practice with the keystrokes below to get used to the keystroke.
The control key comes with different signifiers. Some Unix documentation refers to the control key as ^. Learn to recognize these symbols as the same key:
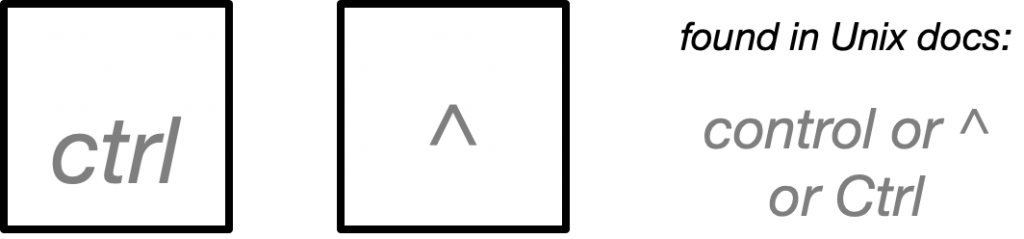
You’ll see the Ctrl key referred to in different ways in Unix documentation, but in this course, I’ll generally refer to it as Ctrl-
Also, note that I will typically reference the other key using an uppercase letter, but that does not mean you should press Shift when typing the keystroke. If a keystroke explicitly requires a Shift, then it will be considered to have two modifier keys: that’s called “Ctrl-Shift” and means we press the Ctrl and Shift key at the same time. For those special cases of two-modifier key keystrokes, both modifier keys are signified (written). For the documentation you see here, the modified key is written in upper case, but you should not press the Shift key unless you also see it explicitly noted.
M- Keys (Alt or Meta Key)
The ALT key and the Meta key are the same key. However, on your shell version, you may have to enable it or map it to one of the special keys on your keyboard. When reading Unix/Linux documentation, you will see the documents use M- when referring to a meta key.
(Remember, as we discussed in Mac setup lesson, Mac OS using Terminal has no default META key — which means you can’t use it until you specifically enable it in the Preferences. You switch this setting to use the Option key from the Terminal preferences. Click Profiles > choose the profile you want (you must do it for each profile here) > click Keyboard > Enable “Use Option as Meta Key”)
On some UIs or documentation, you see the alt key represented like so:

You’ll see the Meta key referred to differently in Unix documentation, but in this course, I’ll generally refer to it as Meta-.
Also, note that I will typically reference the other key using an uppercase letter, but that does not mean you should press Shift when typing the keystroke. If a keystroke explicitly requires a Shift, then it will be considered to have two modifier keys: “Meta-Shift” and means we press the Meta and Shift key simultaneously. For those special two-modifier key cases, both modifier keys are signified (written).
Let’s learn our first two readline shortcuts.
Ctrl-A — Move to the very first character of the line.
Ctrl-E — Move to the very last character of the line.
We’ll start by typing some non-unix commands onto the terminal window.
the quick brown fox jumps over the lazy dogs
This is not a UNIX command; if you press enter, you will get an error. Instead of pressing enter, use the shortcuts Crtrl-E and Ctrl-E to move from the end of the line to the beginning of it (once you finish typing it).
Notice that you use your pinky to press Ctrl and once you’ve pressed it, you press the secondary key (in this case A or E). You don’t need to press Shift or any other key than these two keys
Correctly keystroking a modifier along with its key may be challenging when just starting out.
Train your hand into one smooth motion: Use your pinky to hit the modifier key (in this case Ctrl), and then— perhaps just a fraction of a second later — use your ring finger or your middle finger to hit the the other key.
Since hitting the modifier key alone does nothing (the computer won’t respond), only when you press the other key will the keystroke be registered.
Some people might find using fingers other than the ‘standard’ ones I’ve suggested above is more comfortable. That’s perfectly fine: You should find what works for you because you’ll need to do it all day.
Here, practice using Ctrl-A and Ctrl-E to move back and forth between the beginning of the line and the end of it. All we are doing is moving from the very start of the line to the very last character.
Now, let’s look at our first two Meta key Shortcuts
Meta-B — Move backward one word.
Meta-F — Move forward one word.
Using the example above, let’s move our cursor one word backward and one word forward.
All the Modifier Keys
 (mac) (mac) | Command key |
 | Shift key |
alt or Option or Meta or  | Alt key (Option on Macs) |
 | Caps lock |
 | Control (Ctrl) |
 | Tab key |
The Kill Stack, Kill & Yank
Kill and yank is a feature of the Unix operating system similar to copy & paste in your operating system: It removes text into a holding space and allows you to put text back elsewhere, taking from that holding space. It is essential to master kill and yank to become proficient in Unix keystroking.
When you kill a line of text, you tell Unix to take from your cursor to the end of the line out of where it is. You push (using a FILO — first in last out — push stack) that line into a kill stack containing a list of the last things you killed.
When you yank, you pull the 1st item off the top of the kill stack and insert it back into text, wherever your cursor is. The kill stack then discards the yanked item, and the 2nd-recent item becomes the item at the top of the stack.
Remember, this mechanism is very similar to your OS’s copy & paste feature— which you probably already use— but is completely unconnected. The items you copy or cut in your OS do not affect your Unix kill stack, and vice versa.
C-K — Kill the line of text from the cursor to the end of the current line. Puts the killed text onto the top of the kill stack.
C-Y — Yank the last line of text from the kill stack and stick it into the Unix terminal where your cursor is. Pulls one off the kill stack, moving the 2nd item killed to the top of the stack.
Practice killing lines of text and yanking them back now.
The Readline Shortcuts
Here are the first shortcuts you should memorize to move around your shell. These provide the essential finger keystrokes for all Unix commands you will type. As a DevOps or software coder, you will use these keystrokes when working with ops or application code in the terminal.
These are only the ‘moving around’ keystrokes you should know. Later in this course, we’ll learn more keystrokes using the Ctrl and Meta keys, but for now, review and practice the following keystrokes. (Most, but not all, were introduced above.)
| Ctrl-A | move the cursor to the beginning of line |
| CTRL-A | move cursor to end of line |
| Meta-B | move the cursor back one word |
| Meta-F | move cursor forward one word |
| Ctrl-P | go back to the last shell command you executed |
| Ctrl-F | go to the next shell command (assuming you used CTRL-P to see a pervious one) |
| Ctrl-K | CTRL-K is unix for kill, which means delete all of the text after the cursor. Adds to the shell clipboard, which is different than your operating system clipboard |
| Ctrl-U | delete (or “kill”) all of the text before the cursor. like with CTRL-K, this adds it to the unix clipboard. |
| Ctrl-Y | “yank” (CTRL-y) is similar to what you know as “Paste” on your operating system. It will paste the clipboard (the unix clipboard, not the OS clipboard) to where the cursor currently is. |
| CTRL-R | This powerful feature lets you search the history of commands you have used on this shell prompt. Using an ‘i search,’ any suggestion for a previous command based on the commands you used in this shell prompt will appear. |
Once you’re comfortable practicing these basic moving-around techniques, move on to the next lesson.