1/ Setup Amazon EC2
Create new Amazon EC2 Instance
by clicking “Launch Instance”
- Give you new instance a name
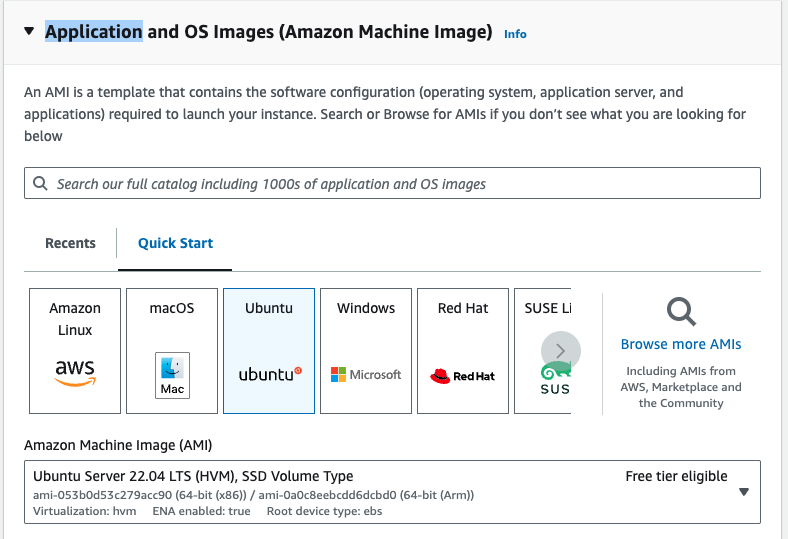
• Kamal works on any Debian-based Linux distribution, like Debian, Mint, or Ubuntu. Do not choose Amazon Linux. Choose Ubuntu.
1A/ Application and OS Images (Amazon Machine Image)
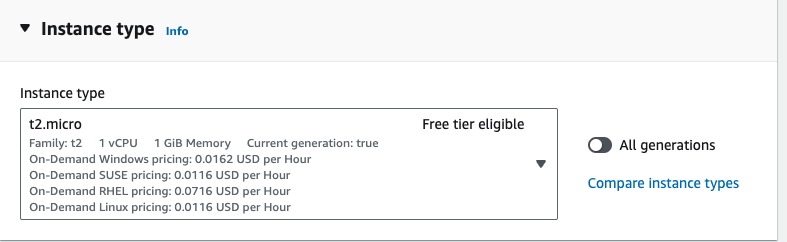
1B/ Instance types
The default is eligible for Amazon free tier, but there is one smaller than this default (t2.nano) which is cheaper if you not free tier eligible.
1C/ Security
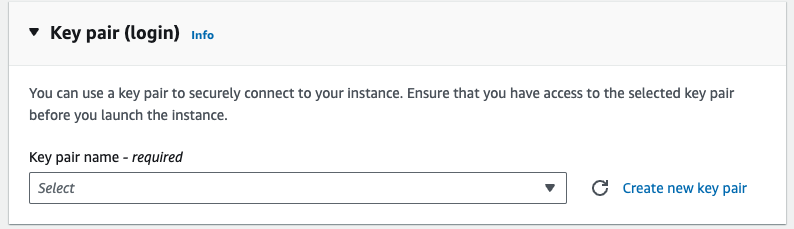
Click “Create new keypair,” give your key a name, choose RSA or ED25519 (either work), and .pem key file format.
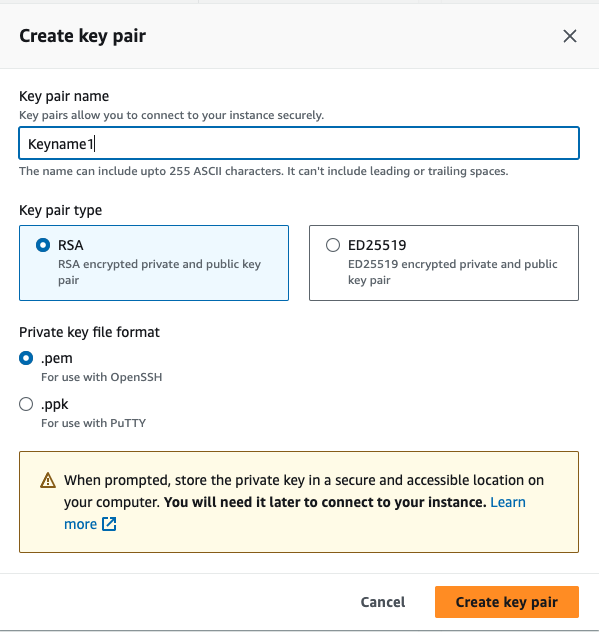
• At this point, your browser will download a .pem file to your drive. Save this file to your hard drive.
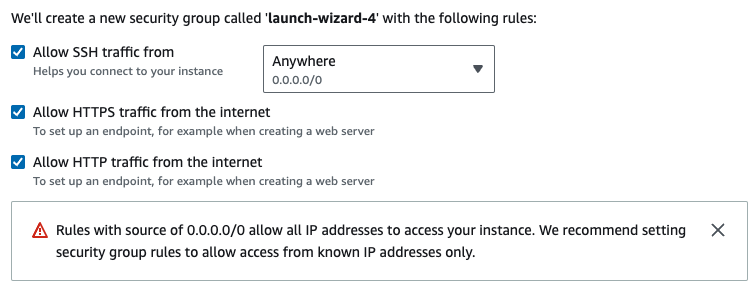
1D/ Network Settings
Under network settings, choose “Create security group” and be sure to enable Allow HTTPS traffic from the internet and Allow HTTP traffic from the internet.
1E/ Security Settings on the PEM File
Once you have the .pem file, move this file into a safe place on your hard drive and set the execute but for the owner:
chmod 0700 abc.pem
Your permissions must be this strict — the ‘group’ and ‘everyone’ settings must be set to no privileges (0).
• When setting up the server for the first time, add it to the ssh-agent. You can do this one of two ways:
ssh-add <path to pem file>.pem
The first method will add the pem file to your SSH Agent and connect to your instance (good practice). The second method adds the pem file to your SSH Agent.
Next, SSH into your instance
ssh -i your-key-file.pem ubuntu@1.2.3.4replace your-key-file.pem with the path to your key (be sure to have set the permissions) and 1.2.3.4 with your IP address from the Amazon EC2 dashboard.
2/ Add Docker Packages To Your Instance using apt-get
2A/ Install Docker on the Ubuntu instance
Then you must install Docker on your Ubuntu instance manually here, as per these instructions.
Or use this quick script here. Be sure to run this on the EC2 instance itself, which means you run it after you’ve run ssh above.
sudo apt-get update && sudo apt-get install ca-certificates curl gnupg && sudo install -m 0755 -d /etc/apt/keyrings && curl -fsSL https://download.docker.com/linux/ubuntu/gpg | sudo gpg --dearmor -o /etc/apt/keyrings/docker.gpg && sudo chmod a+r /etc/apt/keyrings/docker.gpg && echo \
"deb [arch="$(dpkg --print-architecture)" signed-by=/etc/apt/keyrings/docker.gpg] https://download.docker.com/linux/ubuntu \
"$(. /etc/os-release && echo "$VERSION_CODENAME")" stable" | \
sudo tee /etc/apt/sources.list.d/docker.list > /dev/null && sudo apt-get update && sudo apt-get install docker-ce docker-ce-cli containerd.io docker-buildx-plugin docker-compose-plugin && sudo docker run hello-world
(Be sure to answer Y when prompted Do you want to continue? [Y/n])
If this is successful, you should see:
Hello from Docker!
This message shows that your installation appears to be working correctly.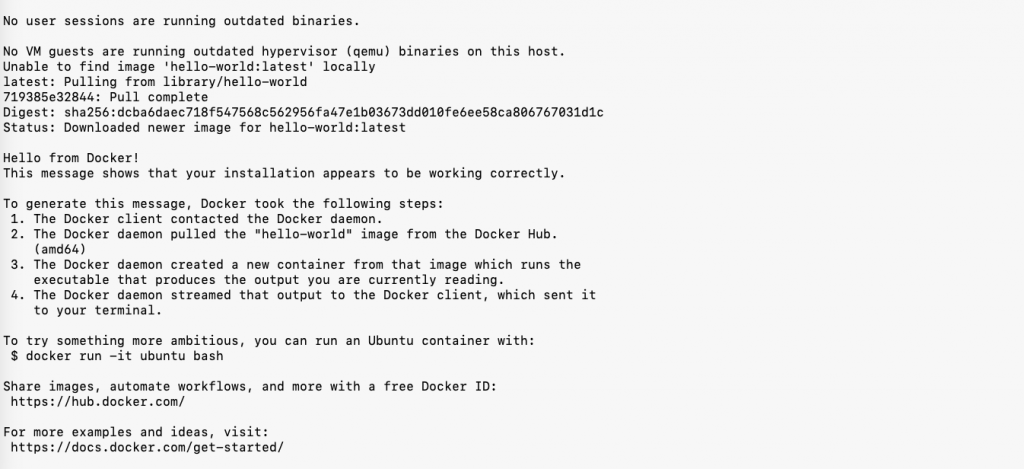
2B/ Allow Docker User on the Instance
sudo usermod -aG docker ${USER}
3/ Make a Rails App (or add Kamal to an existing app)
If you are currently in the instance in your terminal window, use exit to return to your local machine. Now you will prepare your Rails app for Kamal.
3A/ New Rails App
• If you’re making a new Rails app, use my Quick Scripts for New Rails apps.
In Section 1, be sure to choose between (A) JSBundling, (B) Importmap, (C ) Shakapacker, or (D) Vite rails. Section 1 is the only section you will need to complete for a Kamal app.
After making your new app, be sure to check in all your code and make sure the tests are passing.
3B/ Existing Rails App
• If you have dotenv or dotenv-rails set, examine the version of those gems. If those gems are set to old versions, Kamal will also install with an older version. For this reason, do a gem bump (upgrade) on dotenv and dotenv-rails before continuing. (bundle update dotenv dotenv-rails)
For this reason, explicitly set Kamal in Gemfile. (This happens for you if you use bundle add)
3C/ Kamal Init
Run this to add the Kamal gem:
bundle add kamal
Bundler will get the current version number (at the time you run it) and use it to write a fixed version specification for the Gemfile.
gem "kamal", '0.X.0'
Here, instead of X you’ll see the current minor version of Kamal as of the day you install it. Remember, Kamal is currently beta, so its feature set and API are subject to change.
To get the latest version of Kamal, remove the version specification from the Gemfile and run bundle update kamal
Once you have the Gem installed, run kamal init
This will create these files:

Set the IP address from Amazon in config/deploy.yml under the servers section:
servers:
  - 1.2.3.4
Remember, you will find this in your Amazon EC2 dashboard when you go to the running instance where you will make the Kamal deployment.
4/ Setup DockerHub
If you do not already have a DockerHub (docker.io) account, sign up for one.
Create your app on Docker Hub

Give the same name as your instance on Amazon
Once you have created your repo, go back to your config/deploy.yml file
registry:
  username: jasonbolt
Where it says password, don’t change the ENV settings. Instead, go to .env and set the password for KAMAL_REGISTRY_PASSWORD
5/ Dockerize your Rails app
Create a file named Dockerfile in the root directory of your Rails application. This file will define the configuration of your Docker container.
5A/ Create a Dockerfile
Be sure to replace 3.2.1 below with the version of Ruby you are using.
# Use an official Ruby runtime as the base image
FROM ruby:3.1.2

# Set the working directory inside the container
WORKDIR /app

# Set production environment
ENV RAILS_ENV="production" \
    BUNDLE_DEPLOYMENT="1" \
    BUNDLE_PATH="/usr/local/bundle" \
    BUNDLE_WITHOUT="development"

# Install packages need to build gems and node modules
RUN apt-get update -qq && \
    apt-get install -y build-essential curl default-libmysqlclient-dev git libpq-dev libvips node-gyp pkg-config python-is-python3

# Install JavaScript dependencies
ARG NODE_VERSION=19.7.0
ARG YARN_VERSION=1.22.19

ENV PATH=/usr/local/node/bin:$PATH
RUN curl -sL https://github.com/nodenv/node-build/archive/master.tar.gz | tar xz -C /tmp/ && \
    /tmp/node-build-master/bin/node-build "${NODE_VERSION}" /usr/local/node && \
    npm install -g yarn@$YARN_VERSION && \
    rm -rf /tmp/node-build-master

# Install application gems
COPY --link Gemfile Gemfile.lock ./
RUN bundle install && \
    rm -rf ~/.bundle/ "${BUNDLE_PATH}"/ruby/*/cache "${BUNDLE_PATH}"/ruby/*/bundler/gems/*/.git && \
    bundle exec bootsnap precompile --gemfile

# Install node modules
COPY --link package.json yarn.lock ./
RUN yarn install --frozen-lockfile

# Copy application code
COPY --link . .

# Precompile assets (optional, but recommended for production)
RUN SECRET_KEY_BASE_DUMMY=1 ./bin/rails assets:precompile

# Expose the port on which your Rails app will run (e.g., 3000)
EXPOSE 3000

# Start the Rails server
CMD ["bundle", "exec", "rails", "server", "-b", "0.0.0.0"]
5B/ Set the RAILS_MASTER_KEY
For Rails 7.0
For Rails 7.0, prepend your asset compile step with
SECRET_KEY_BASE=DUMMY
In your Dockerfile, replace the line RUN ./bin/rails assets:precompile with
RUN SECRET_KEY_BASE=DUMMY ./bin/rails assets:precompile
For Rails 7.1
For Rails 7.0, prepend your asset compile step with
In your Dockerfile, replace the line RUN ./bin/rails assets:precompile with
RUN SECRET_KEY_BASE_DUMMY=1 ./bin/rails assets:precompile
5C/ Build Your Docker Image
docker build -t 2023-02-02-image .Make sure to replace 2023-02-02-image with a suitable name for your Docker image, like the name of your app and the current date. The name may contain numbers and hyphens (-) but not uppercase characters.
5D/ Tag Your Docker image & Push it to Dockerhub
docker tag 2023-02-02-image jasonboldt/reponame:2023-02-02-tag
Remember, replace 2023-02-02-image with the image name created above, jasonboldt with your Dockerhub username, reponame with the repository name as defined in Dockerhub’s dashboard, and 2023-02-02-tag with a new arbitrary tag name (specified here in this step)
Notice that you must specify an image name above and here a tag name. For both, I have used a date with the suffix -image and -tag, but you can use anything that contains lowercase letters, numbers and hyphens.
Finally, push this tag to Dockerhub
docker image push jasonboldt/reponame:2022-02-02-tag
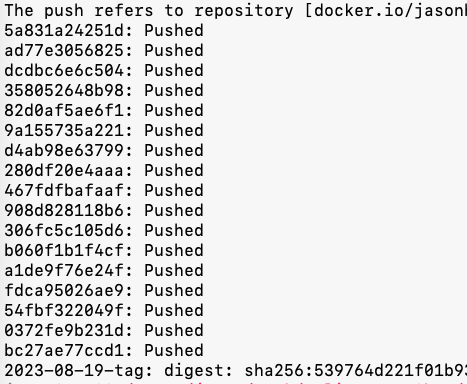
It should finish with a line like this:
2023-02-03-tag: digest: sha256:539764d221f01b932e567e9894b385e87b2e0f396e9b436e10bd062e82fdc378 size: 3897Go to your Dockerhub account, navigate to the repo, and confirm that you see the tag you just pushed under Tags section.
5E/ Configure database settings (optional):
If your Rails app uses a database, you must adjust the config/database.yml file to connect to the database container. Instead of using localhost, use the database container’s container name or IP address.
Set up a database container (optional):
If your Rails app requires a database, you can either use a separate database service (e.g., PostgreSQL) or create a database container alongside your Rails container. There are various options for this, including using Docker Compose to manage multiple containers. For simplicity, here’s a basic command to run a PostgreSQL database container:
docker run -d --name db_container -e POSTGRES_PASSWORD=your_password postgres:latest
Replace your_password with a secure password for your PostgreSQL instance.
Run the Rails container:
Now, it's time to run your Rails container:
docker run -d --name rails_container -p 3000:3000 --link db_container your_image_name
Replace your_image_name with the name you used in the earlier step. The -p flag maps port 3000 from the container to the host machine, allowing you to access the Rails app from http://localhost:3000 on your computer.
6/ Confirm you have the correct SSH User set in Kamal
On Ubuntu, uncomment this section and change the value to ubuntu (the root user for the instance)
# Use a different ssh user than root
ssh:
  user: ubuntu
Confirm that you can ssh into your instance and that kamal lock status works (even though this command returns the lock’s status, you are testing the authorization to the instance.)
Remember, connect to your instance on the command line with
ssh -i path/to/key.pem ubuntu@1.2.3.4
This should let you into the instance. (Be sure to replace path/to/key.pem with your real PEM file and 1.2.3.4 with the IP address).
If when running kamal lock status or kamal deploy, you see
(Net::SSH::AuthenticationFailed): Authentication failed for user
Fix with this:
eval `ssh-agent -s`
ssh-add path/to/key.pem
Be sure to replace path/to/key.pem with your real PEM file.
Confirm that SSH and kamal lock status do not give Authentication failed errors here before moving on. If you have problems, recheck the IP address and the SSH user in the deploy.yml, and that the ssh-agent has the keyfile added to it. As well, confirm that the net-ssh gem is at least version 7.1 or higher.
7/ Set your Kamal Builder
builder:
  args:
    RUBY_VERSION: "<%= Pathname.pwd.join('.ruby-version').read.strip.delete_prefix('ruby-') %>"
    BUNDLER_VERSION: "<%= Bundler::LockfileParser.new(Pathname.pwd.join('Gemfile.lock').read).bundler_version %>"
    RAILS_MASTER_KEY: "<%= ENV['RAILS_MASTER_KEY'] %>"
8/ Deploy with Kamal
run
kamal deploy
9/ Check Your Production Logs
You may likely hit a Rails error, but which one I cannot predict. To check your production logs take these steps:
- ssh into the container
- run
docker psto show two running containers, your app and traefik - Get the Container ID itself for the next step

4. run docker attach xxxxxxxxxx
Be sure to replace xxxxxxxxxx with the Container ID you see in the docker ps list
TROUBLESHOOTING
Problem A: Could not open lock file /var/lib/apt/lists/lock - open (13: Permission denied)
To fix:
• Make sure the ssh user specific to your Linux distro (in Ubuntu’s case, the user must be ubuntu) (other than “root”) is set in config/deploy.yml
# Use a different ssh user than root
ssh:
  user: ubuntu
• Confrom that net-ssh gem version is at least 7.1
• Confirm the IP Address from Amazon EC2 matches what you have in config/deploy.yml
• Make sure the key file is added to the ssh-agent
eval `ssh-agent -s`
ssh-add path/to/key.pem
See https://github.com/basecamp/kamal/issues/178
Problem B: Got permission denied while trying to connect to the Docker daemon socket at unix:///var/run/docker.sock: Post “http://%2Fvar%2Frun%2Fdocker.sock/v1.24/auth”: dial unix /var/run/docker.sock: connect: permission denied
This can happen when you are installing onto an Linux distro where the admin (like ubuntu) is not allowed to use the remote Docker docket.
To fix:
• Manually SSH into your server instance, then run
sudo usermod -aG docker ubuntu
see this issue
Problem C: ArgumentError: Missing secret_key_base
#29 0.938 ArgumentError: Missing `secret_key_base` for ‘production’ environment, set this string with `bin/rails credentials:edit`