If you want Bootstrap with Sprockets and ImportMaps, you will pin your JS dependencies — in our case Bootstrap and Popper — in any one of these 3 ways:
(1) Via a CDN,
(2) from the vendor folder of a Gem, or
(3) from your own vendor/javascript folder.
How to Get Rails 7 Bootstrap from Sprockets and Sassc-Rails by Pinning with Importmap
Under the ImportMap paradigm, you can’t load a Javascript library via a package manager, like NPM, but you can load it with any ES Module Javascript framework.
Note that sass-rails is now no longer enabled in the Rails 7 default installation, but it is in your Gemfile as a commented-out gem. (So you will need to uncomment and bundle install to use it, which are in the steps below.)
Remember “Sprockets” is another name for “asset pipeline.” For a detailed history of the Rails gem defaults check out my blog post about Hampton Lintorn-Catlin’s petition for Rails to adopt a Node-based Sass compiler. The rejection of this petition signaled that Rails 7 was switching to the C-based compiler in the sassc-rails gem.
What makes sassc-rails different from sass-rails is that sassc-rails uses the C-based compiler to transpile the SCSS/SASS (it’s very fast!). The alternative, sass-rails (got ejected from Rails defaults) was preferred by the Node community. It uses a Node compiler (Javascript). However, sass-rails is pretty slow so the Rails community didn’t like being dependent on it.
That means that because sassc-rails is commented out in the default Gemfile, sprockets-rails was made part of the default Gemfile. Before Rails 7, both sass-rails and sprockets-rails (by being a dependency on sass-rails) were part of what got loaded in the default Gemflie, even though sprockets-rails wasn’t actually in the default Gemfile.
Under Rails 6 it was confusing to work between Sprockets — a paradigm primarily geared towards a single JS payload to reduce initial page load time, and Webpack — a paradigm to build new-style Javascript in a backward-compatible way (‘transpiling’). New Javascript has a code splitting feature (allows you to load dependencies on-demand) that can operate over HTTP2 (keeps network connections active to significantly reduce the cost of many many requests). The old Javascript, and the asset pipeline, actually work against this new Javascript paradigm by continuing to be structured around dependency and package management.
In Rails, this confusion was not helped by the fact that having both the Asset Pipeline (Sprockets) and Webpacker enabled you to pick and choose and many developers new to the eco-system got lost in the choice overload.
Now, with Rails 7, the Rails core team has officially ejected Node (webpacker) for three primary reasons:
• ImportMap, a feature where we can load ES modules dynamically at runtime, is natively available in Chrome and Firefox and works with a shim with the other modern browsers.
• Internet Explorer (IE) is finally dead
• HTTP2, which is now widely available on all modern browsers too, doesn’t have the ‘each network request’ cost associated with HTTP1 that the traditional web had.
However, keep in mind that this was at the price of having a development & deployment experience for things like Typescript, NPM/Yarn-managed JS dependencies, and a React-friendly setup. For those things, you’ll want either JSBundling or Shakapacker. To help you choose, see this post.
Today’s Goal:
• Get Rails 7 working with Bootstrap via ImportMap-Rails
• Sassc-Rails
• Stimulus + Turbo
In this tutorial, we will use the standard rails new command which comes bundled with everything listed (except Bootstrap). I will also go over step-by-step how to confirm that each component is working.
For a faster quick setup guide that excludes verifying each component, see this post.
Let’s start by making a new app.
rails new MyGreatApp
By using none of the flags when creating a new Rails 7 app, you will be creating a Rails app with Sprockets, Imoprtmaps, Stimulus, and Turbo (sprockets-rails, importmap-rails, stimulus-rails, turbo-rails).
1. Hello sassc-rails Gem
Start by uncommenting the scssc-rails gem which is commented out by default in the Gemfile:
gem "sassc-rails"2. Turn on Inline Source maps (so we can debug Rails 7 Bootstrap)
in config/environments/development.rb add this line:
config.sass.inline_source_maps = trueAlso, the sassc-rails gem README advises this note as well:

3. Switch application.css to application.scss
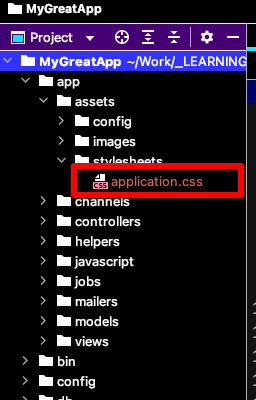
Delete this file:

Now make a new empty file called application.scss in the same folder app/assets/stylesheets/
4. Import Rails 7 Bootstrap into your Application
Add to Gemfile, add
gem 'bootstrap', '~> 5.1.3'In this case we are using the old Bootstrap gem for its CSS only as a bridge between the old Sprockets world and Bundling world. In this example, our JS will be served through Importmap’s new paradigm.
Also, in the application.scss file we created in Step 3, add this:
@import "bootstrap";5. Add .scss to Asset Precompilation (because it’s needed by Rails 7 Bootstrap)
Go to config/initializers/assets.rb
We want to uncomment and change this line:
Rails.application.config.assets.precompile += %w( application.scss )Notice that we do not have to make any changes to our application.html.erb, which by default looks as below. This is handy and happens because the stylessheet_link_tag just references the stylesheet file without the extension type, which means it picks up the SCSS instead of the CSS file when we switched it from one to the other.
<!DOCTYPE html>
<html>
  <head>
    <title>MyGreatApp</title>
    <meta name="viewport" content="width=device-width,initial-scale=1">
    <%= csrf_meta_tags %>
    <%= csp_meta_tag %>

    <%= stylesheet_link_tag "application", "data-turbo-track": "reload" %>
    <%= javascript_importmap_tags %>
  </head>

  <body>
    <%= yield %>
  </body>
</html>
No changes here.
6. Dummy Controller & Route
Create the articles controller with:
rails generate controller Articles
Add an empty def index to it:
class ArticlesController < ApplicationController
  def index
  end
end
in config/routes.rb, uncomment this line:
root "articles#index"And finally, create a Hello World file at app/views/articles/index.erb
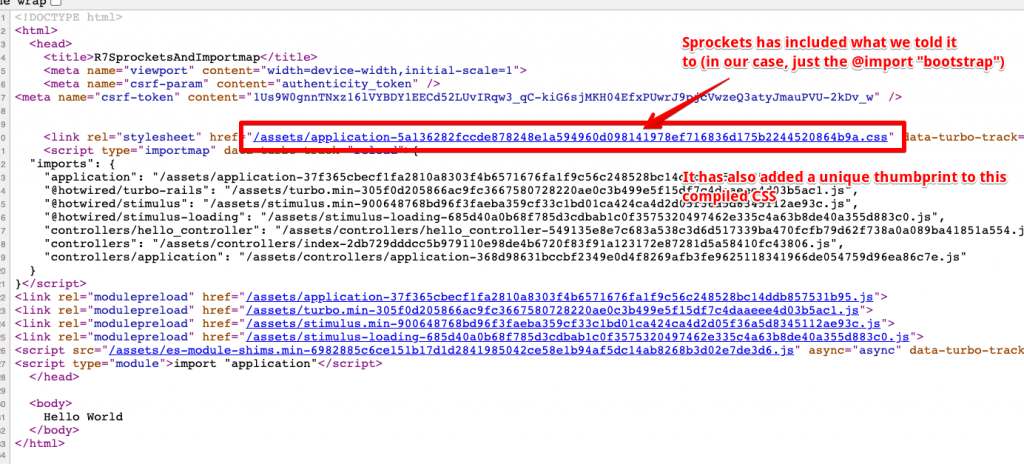
Hello World!Now, load your website in your browser and click “View Source”

Notice here that Sprockets has applied a thumbprint to this specific build. When we change anything in our CSS, Sprockets will recompile the application file and give it a new thumbprint.
7. Now add Something for Rails 7 Bootstrap
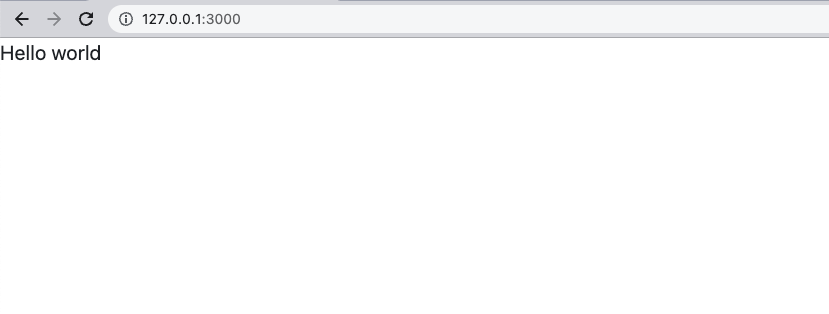
If we look in our browser, our existing layout looks like so:

The shrewd eye might notice that Bootstrap is in fact applied, but we would hardly notice since all our app does is say “Hello World”‘
So let’s add a Bootstrap navbar:
    <nav class="navbar navbar-expand-lg navbar-light bg-light">
    <div class="container-fluid">
      <a class="navbar-brand" href="#">Navbar</a>
      <button class="navbar-toggler" type="button" data-bs-toggle="collapse" data-bs-target="#navbarSupportedContent" aria-controls="navbarSupportedContent" aria-expanded="false" aria-label="Toggle navigation">
        <span class="navbar-toggler-icon"></span>
      </button>
      <div class="collapse navbar-collapse" id="navbarSupportedContent">
        <ul class="navbar-nav me-auto mb-2 mb-lg-0">
          <li class="nav-item">
            <a class="nav-link active" aria-current="page" href="#">Home</a>
          </li>
          <li class="nav-item">
            <a class="nav-link" href="#">Link</a>
          </li>
          <li class="nav-item dropdown">
            <a class="nav-link dropdown-toggle" href="#" id="navbarDropdown" role="button" data-bs-toggle="dropdown" aria-expanded="false">
              Dropdown
            </a>
            <ul class="dropdown-menu" aria-labelledby="navbarDropdown">
              <li><a class="dropdown-item" href="#">Action</a></li>
              <li><a class="dropdown-item" href="#">Another action</a></li>
              <li><hr class="dropdown-divider"></li>
              <li><a class="dropdown-item" href="#">Something else here</a></li>
            </ul>
          </li>
          <li class="nav-item">
            <a class="nav-link disabled" href="#" tabindex="-1" aria-disabled="true">Disabled</a>
          </li>
        </ul>
        <form class="d-flex">
          <input class="form-control me-2" type="search" placeholder="Search" aria-label="Search">
          <button class="btn btn-outline-success" type="submit">Search</button>
        </form>
      </div>
    </div>
  </nav>
Ok now let’s take a look:
Our app now has what looks like a Bootstrap Navbar, but if you examine it closely, you’ll notice it is not working.
That’s because we haven’t yet added the correct Bootstrap + Popper javascript to our Importmaps.
8. Choose to either use your JS via CDN or as vendor file
We’re going to pin this file using ImportMap. This small little piece of magic needs to be done under the hood to make ES Modules work, and fortunately, the Rails core team has done most of the hard work for you.
What you need to do is pin the name bootstrap, popper (or anything else in the future) to those “named” imports. A shim allows for the browser to automatically import those dependencies whenever it encounters an ES Module that needs them.
Option #1: Use Via a CDN
Pin Bootstrap and Popper:
./bin/importmap pin bootstrap@5.1.3
./bin/importmap pin @popperjs/core@2.11.2
Go to config/importmap.rb and look at the lines that got added:
pin "bootstrap", to: "https://ga.jspm.io/npm:bootstrap@5.1.3/dist/js/bootstrap.esm.js"
pin "@popperjs/core", to: "https://ga.jspm.io/npm:@popperjs/core@2.11.2/lib/index.js"
Add Bootstrap to the Application
Because Bootstrap requires Popper, we just need to Import bootstrap once in the application.js file to make it available via the importmap.
go to app/javascript/application.js and add the Bootstrap import
import "bootstrap"Now start the Rails server.
The Boostrapy interactions work!

Also, because this is built-in to the Navbar we built, if you shrink your browser window a bit you’ll see the hamburger nav for mobile:

Option #2: Use Bootstrap & Popper Bundled from the Gem
What we did above is called loading the from a CDN. That means we tell the browser to load the JS dependencies (Bootstrap, and Popper) directly from the sky. Optionally, we can pack up the JS into our application from the compiled source in the bootstrap gem.
However, to do that we need to tell Sprockets to load it.
As DHH explains in his Aug 12, 2021 blog post:

That means that under this paradigm, you can’t load a Javascript library via a package manager, like NPM. If you need to do that, instead take a look at these instructions for JSBundling or these instructions for Shakapacker on Rails 7.
In order to discourage adding useless Gems, you should no longer be using “shell only” Javascript wrapper Gems as we did in the past, so you should not install the jquery-rails gem. Bootstrap 5 no longer needs Jquery at all.
in config/initializers/assets.rb
Add bootstrap.min.js popper.js
Rails.application.config.assets.precompile += %w( application.scss bootstrap.min.js popper.js )In config/importmap.rb add
pin "popper", to: 'popper.js', preload: true
pin "bootstrap", to: 'bootstrap.min.js', preload: true
Finally, in app/javascript/application.js:
import "popper"
import "bootstrap"
Option #3: Download Bootstrap JS & and Popper and Bundle them Directly into your App vendor/javascript/ folder
NOTE: This option doesn’t really make a lot of sense, but is presented here for completeness. The reason it doesn’t make sense is that for this option, we are using Sprockets to bundle Bootstrap’s CSS (as with the options above), but then packing up the Javascript into our own app.
GO TO https://getbootstrap.com/ and click Download
Unzip the zip archive and move the JS files into vendor/javascript in your app

Now do the same for Popper which you can do at https://popper.js.org/
in config/initializers/assets.rb
Add bootstrap.min.js popper.js
Rails.application.config.assets.precompile += %w( application.scss bootstrap.min.js popper.min.js )In config/importmap.rb add
pin "popper", to: 'popper.min.js', preload: true
pin "bootstrap", to: 'bootstrap.min.js', preload: true
Finally, in app/javascript/application.js:
import "popper"
import "bootstrap"
Note that in Rails 7, there is now another file called application.js also, inside of the Stimulus controllers, which you should not confuse with this application.js file.